
Products
Sell retail items at the till and in the booking flow, track stock per location, and set branch-specific prices most owners never find.
Updated 19 July 2026
When you want to sell shampoo, supplements, dye, or gift items alongside your services — and know how much is left on the shelf — this is where you set them up. Once a product is here you can add it to a sale at checkout, offer it in the customer booking flow, and track stock; if you run more than one branch you can stock different products and even charge different prices at each.
Open in app: Products
Create your first product
Every product lives inside a category, so a category comes first. On an empty catalog the page shows Get Started with Your Product Catalog with a Create Category button — make a category, then add products to it. This is the intended order, not a missing button.
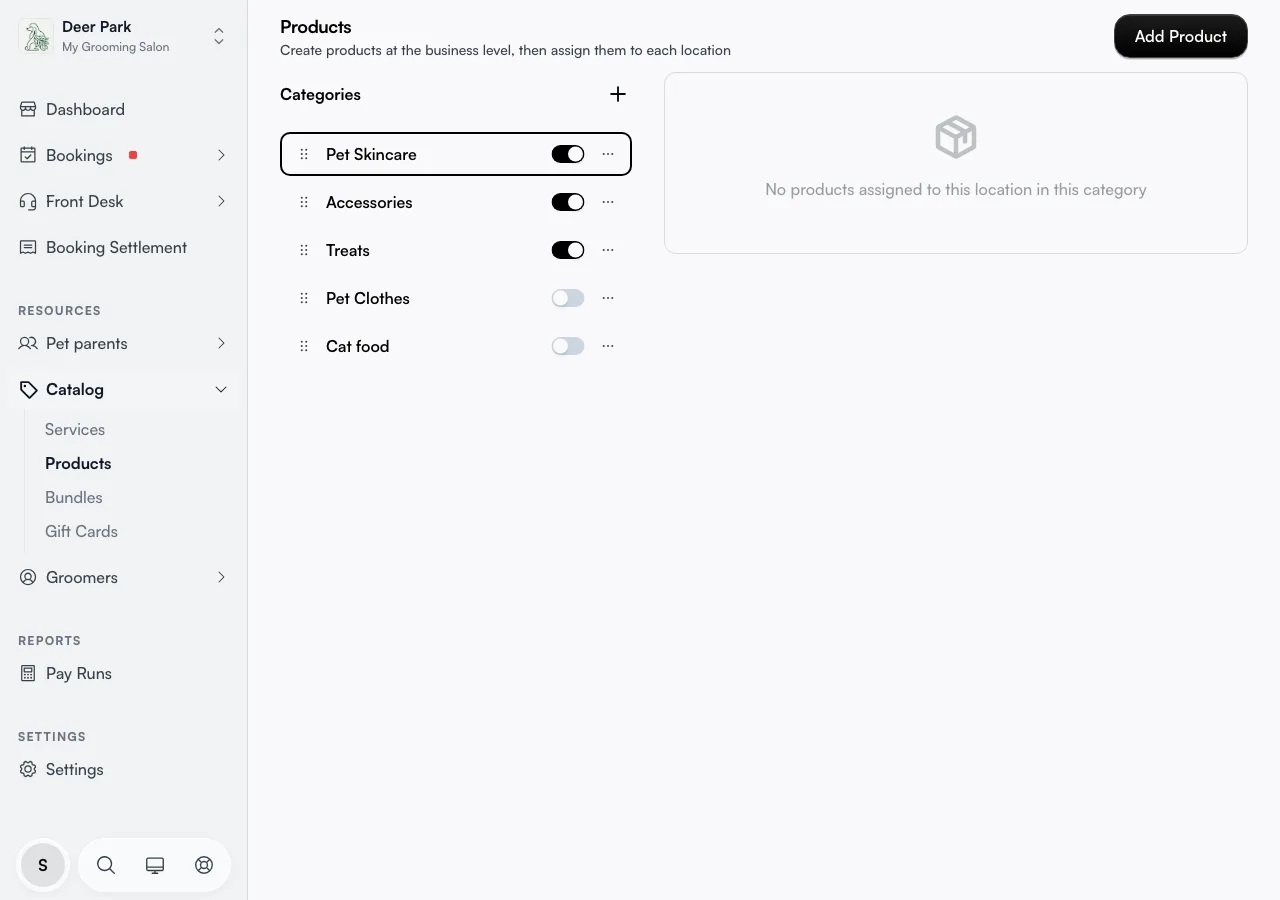
To add one, click Add Product (top right), then fill in:
- Product Name (required) and an optional Description.
- A Category (required) — it defaults to the category you have open.
- Under Pricing, click Add variant to add your first variant row: Variant Name (required), Price, and Stock Quantity.
A variant is one buyable form of the product. Use Add variant again for more — "250ml" and "1L", or "Single" and "6-pack" — each with its own price and stock count. Click Create Product to finish.
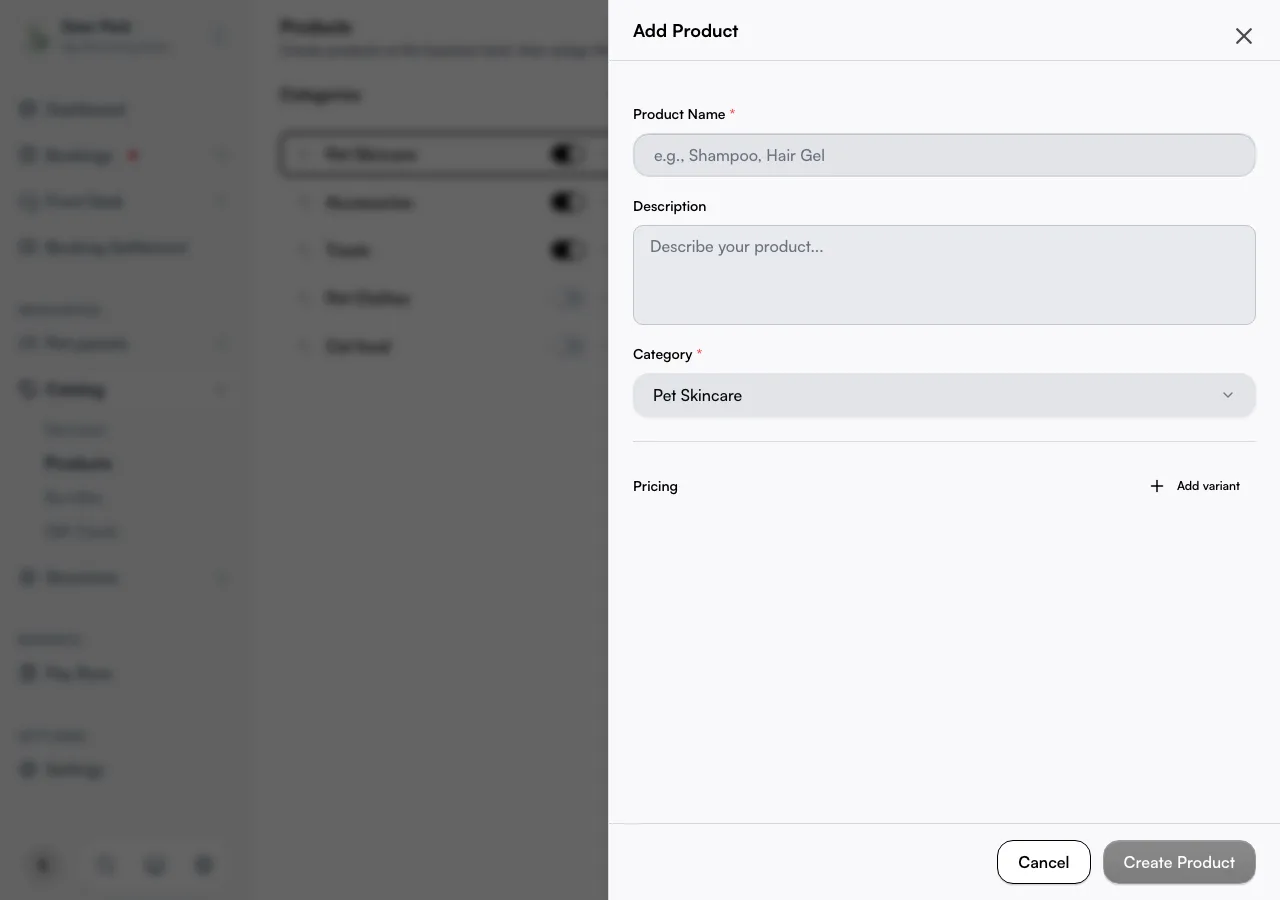
The Create Product button stays disabled until the name, a category, and at least one variant with a name are all filled in. Price and stock can be zero.
Put a product in front of customers (it's hidden until you do)
A new product is not shown to customers automatically — it starts unpublished and stays internal until you publish it. Built one and customers can't see it in the booking flow? That's why. Open the ⋯ menu on the product row and choose Publish; the red Unpublished label disappears. Use the same menu to Unpublish any time you want to pull something without deleting it — handy for a seasonal item or one that's out of stock.
Add photos to a product
Open a product (click its row), and in edit mode an Images section appears between the details and pricing. Upload up to five photos there. Images only show on an existing product, so create the product first, then reopen it to add them. If you start uploading or removing images and try to close without saving, Seglo asks you to confirm before discarding — so a half-finished edit won't vanish by accident.
Keep stock counts honest
Stock is a count you maintain per variant — Seglo shows it next to each variant on the product row and at the till, but doesn't change it for you on a sale. Keep it current so the number staff see matches the shelf. With a location selected, the stock shown is that branch's count, and the product row also shows the location's total stock at a glance.
Stock different products at each branch
If you run more than one location, the location switcher changes what this page does:
- No location selected — you're editing the business-wide master catalog, the full list every branch draws from.
- A location selected — you're in location mode. Add Product opens Add Products to Location first, where you tick existing products to stock at this branch (search by name or category, select several at once, then Assign Selected). To build something brand new, click Create New Product inside that dialog — it's created and assigned to the current branch in one step.
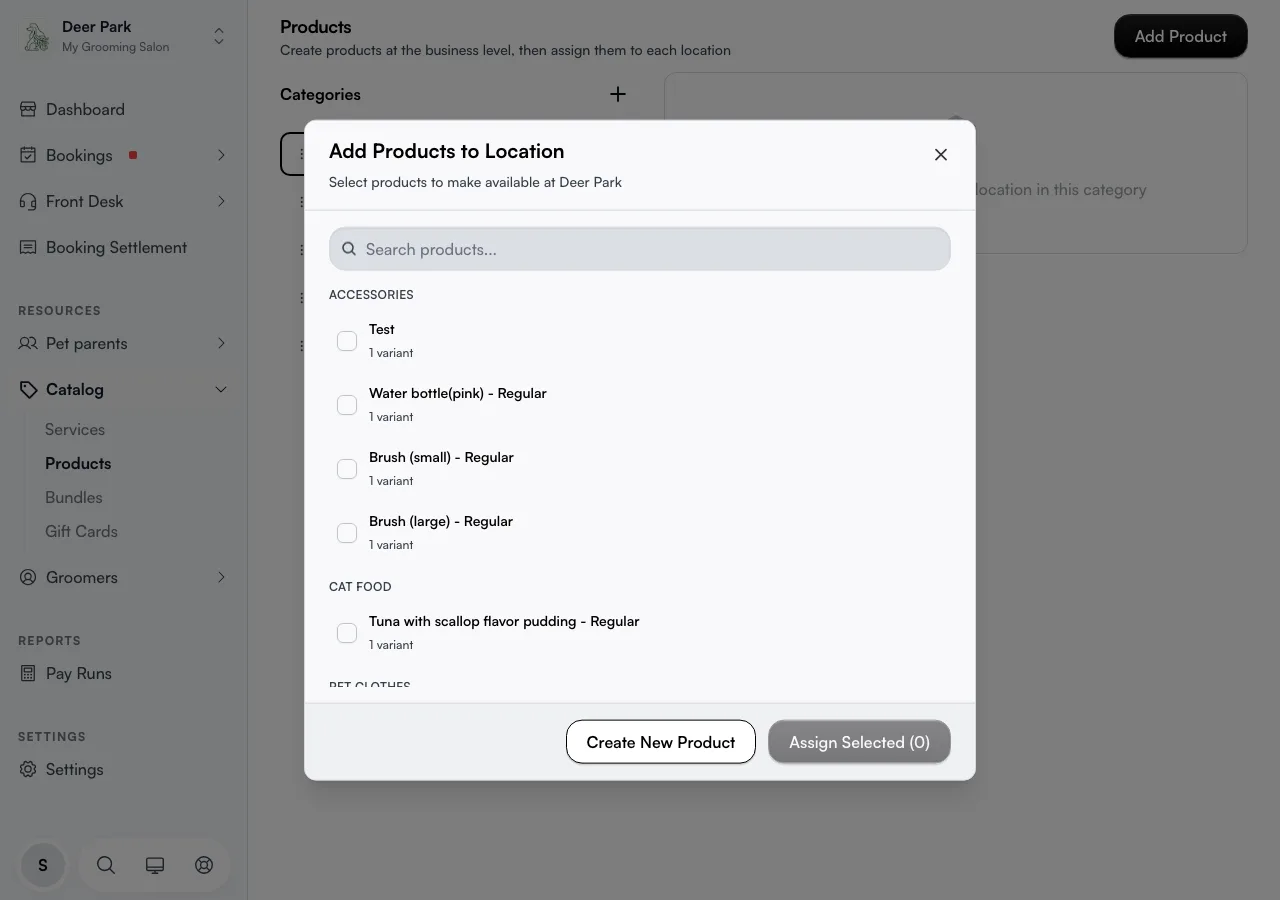
To stop offering a product at one branch without deleting it, open the ⋯ menu in location mode and choose Remove from Location — it stays in your master catalog and at every other branch. That's the safe way to trim a branch's range; Delete removes it everywhere.
Charge a different price at one branch
This is the buried one. In location mode, a variant can carry a price that overrides the master price for that branch only — when it does, the row shows a small Override badge and the price you see is the branch's price, not the master. Use it for a single-branch promo or a pricier flagship store, while the rest of your branches keep the master price untouched.
Set the order customers and staff see
Drag a category in the left list to reorder your categories, and drag a product by its handle to reorder products within a category — both orders are exactly what customers and staff see. Put your best-seller first. In location mode, reordering is saved for that branch.
Hide a whole category at one branch
In location mode each category row gets a show/hide toggle. Flip it off and that entire category disappears from that branch's view — nothing is deleted, and the category is untouched everywhere else. Turn it back on whenever you like.
Tips
- New products are hidden by default. If customers can't see one, it's almost always still Unpublished — open the ⋯ menu and Publish.
- Remove from Location ≠ Delete. Remove pulls a product from one branch only; Delete erases the product and all its variants everywhere, and can't be undone.
- The Override badge means a branch price is in play. If a variant's price looks wrong at one branch, check whether it's carrying a location override rather than the master price.
- Stock doesn't move itself. Selling a product doesn't decrement the count — update it by hand so the till matches the shelf.
- No physical items to sell? If you only offer services, skip this page and set those up in your service catalog instead.
Related
- Service catalog — the bookable services your products sit alongside.
- Service photos and portfolio — show off products and services with images.
- Bundles — group services into pick-any packages.