
Client directory
Find a regular, add a walk-in, block a no-show, and dig into a customer's full history — plus the warnings and notes most owners never spot.
Updated 19 July 2026
When you need to pull up a regular, add a walk-in on the spot, fix a wrong phone number, or stop a problem customer from booking again, this is the page you open. It is your single list of everyone the business has ever booked or you have added by hand.
You reach it from the left navigation under Clients, then Directory. The menu label follows your industry — a pet-grooming business sees Pet parents, others see Clients or Customers — but it is the same page everywhere.
Open in app: Client directory
Find a customer fast
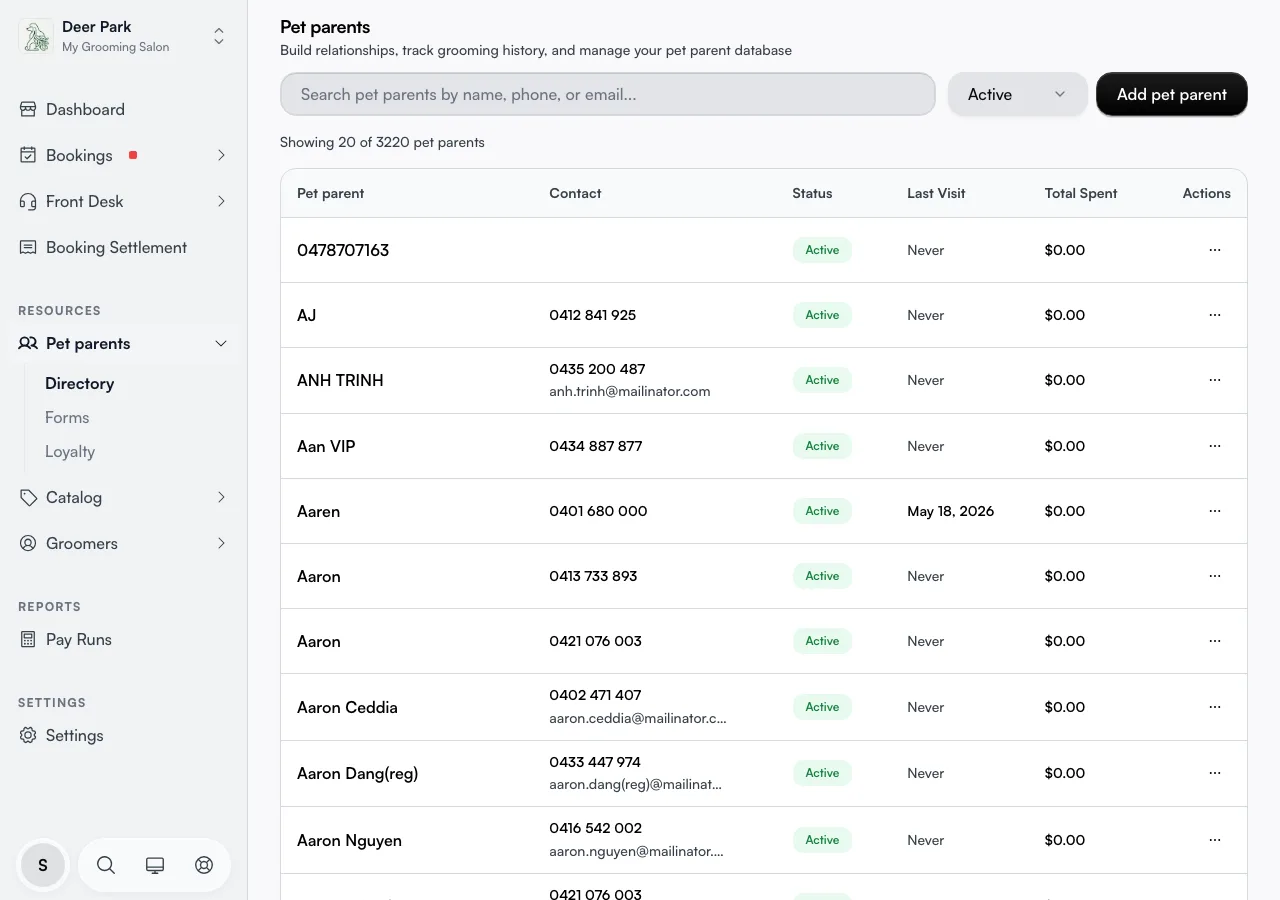
Type into the search box at the top. It matches name, phone, or email, and partial text works — a few letters or part of a number is enough. The list filters as you type, and the count under the box ("Showing 20 of 3220") tells you how many records match. More rows load automatically as you scroll, so you never page through by hand.
Your search and filter live in the page address, so a filtered view can be bookmarked or shared with a colleague and it reopens exactly the same. The customer search in the top command bar links straight here too — picking a result opens that person's record directly.
Narrow the list by status
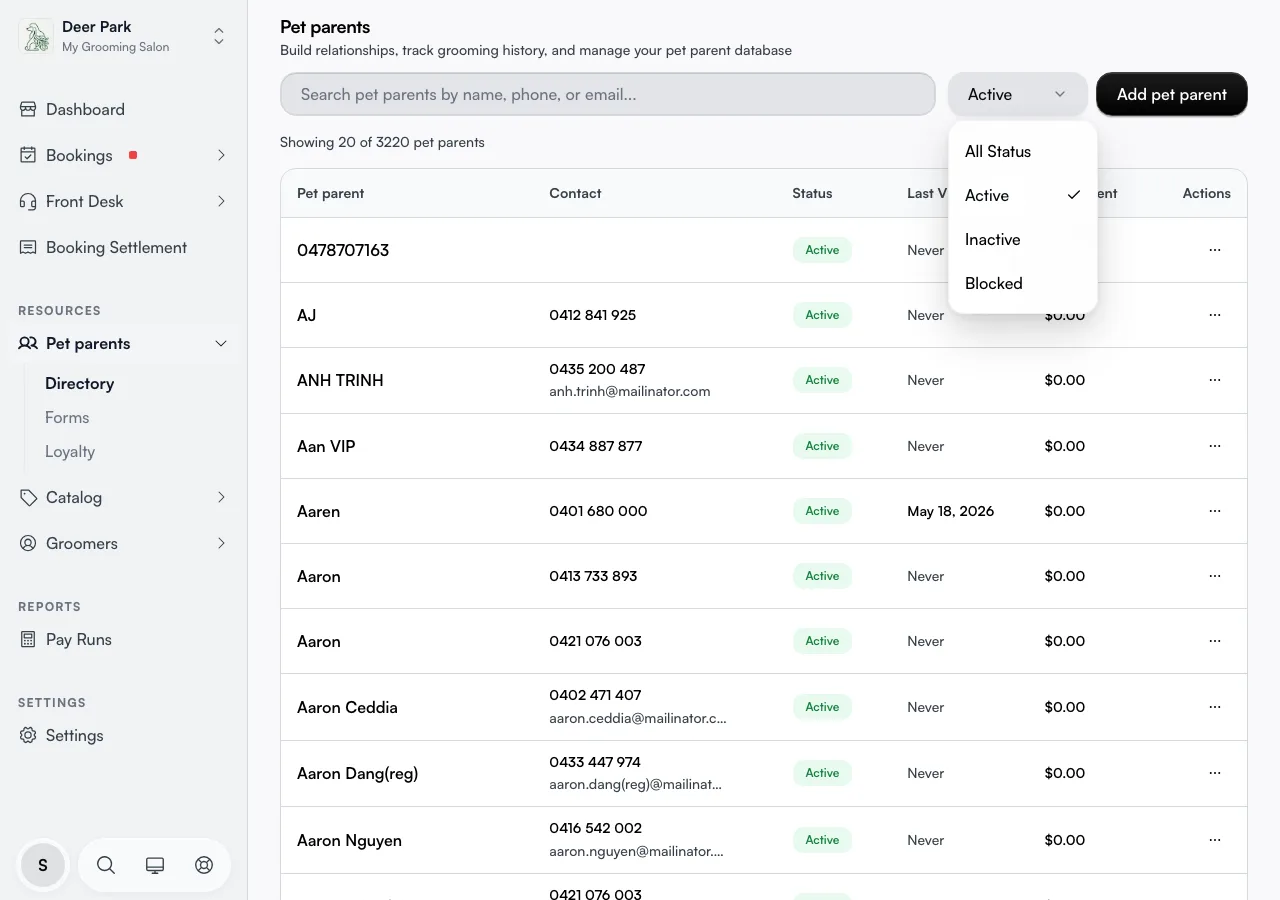
Open the status dropdown next to the search box and pick All Status, Active, Inactive, or Blocked. The list opens on Active by default, so anyone you have set to Inactive or Blocked is hidden until you switch this — worth remembering if someone "vanishes" from the directory.
Add a customer by hand
Most customers add themselves when they book online. Add one by hand for a walk-in, a phone enquiry, or anyone you met offline.
- Click Add Client in the top right.
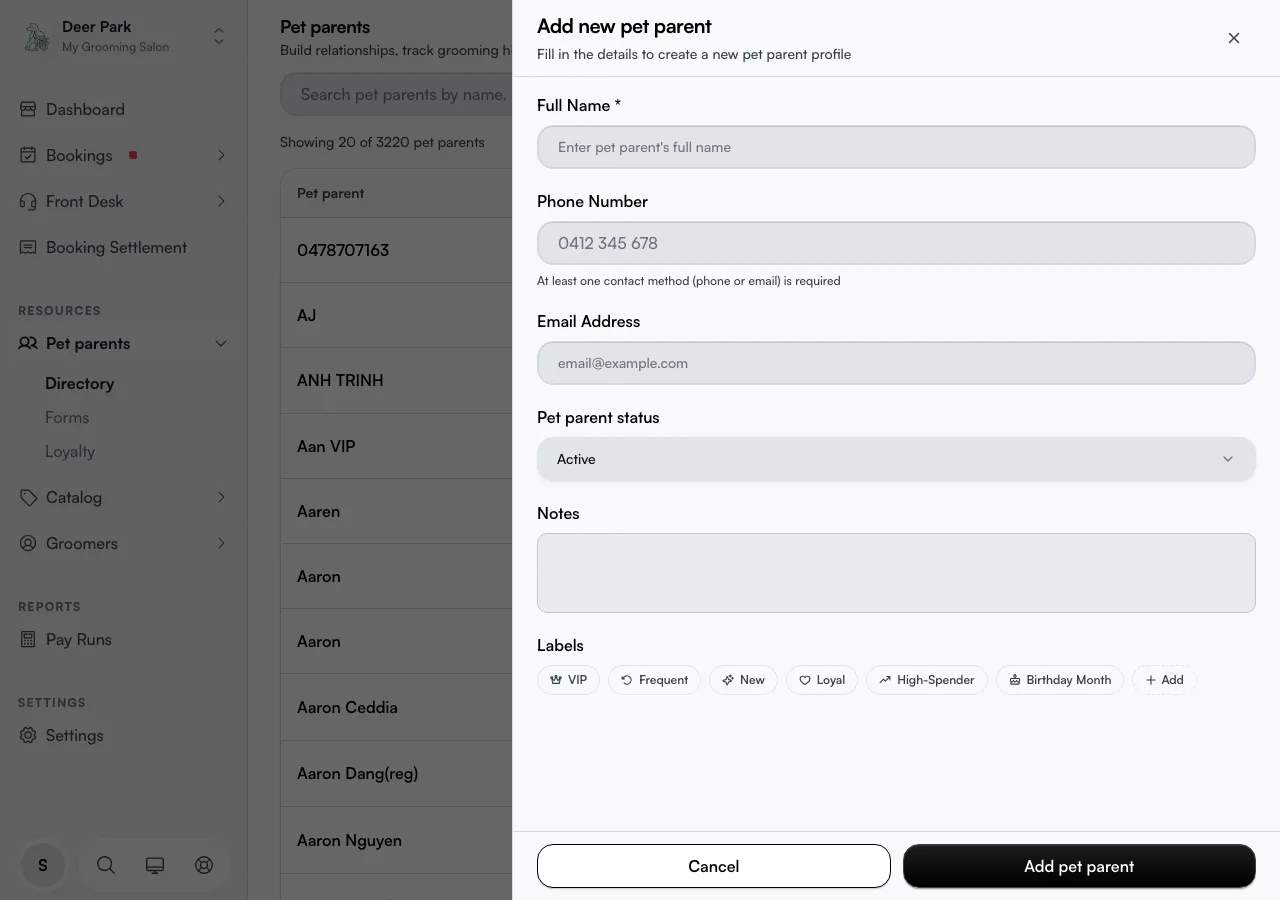
- Fill in the Full Name — the only truly required field.
- Add a Phone Number or an Email Address. At least one is required so you can reach them.
- Add notes and any labels you want, then save. New customers are created Active automatically.
Adding many people at once from a spreadsheet? Use Data import instead of entering them one by one.
Avoid creating a duplicate
As you type a phone or email, the form checks your existing customers and shows a warning right under the field if it spots a possible match. If you try to save anyway, a confirmation step lists who it clashes with so you can stop and reuse the existing record instead of making a second one. When you are editing someone, that same person is left out of the check, so editing never flags itself.
Tag your customers
Labels make a customer easy to spot later. Tap any preset — VIP, Frequent, New, Loyal, High-Spender, or Birthday Month — to apply it, and tap again to remove it. Hit Add to type your own label for anything the presets do not cover.
Keep notes a customer never sees
Opening an existing customer shows a single Notes section. Nothing here is customer-facing — this whole directory lives on your staff dashboard — so it is safe to use for the things you would never say to their face: allergies to watch, a tricky temperament, a billing caution.
See history, profiles, and rebook in one place
Open an existing customer and the drawer pulls together far more than their contact details:
- Profiles — the pets, vehicles, or family members attached to them (see Client profiles).
- Forms — answers they gave on your intake forms.
- Recurring Bookings — any standing series they are on.
- Recent Appointments — their visit history, split into Upcoming and Previous tabs.
- A stats row up top shows their visit count, total sales, and the date they became a customer, plus a Make Appointment action so you can put them back on the calendar without leaving the screen.
Block a problem customer
Each row has a three-dot menu under Actions. Choose Blacklist to stop someone booking.
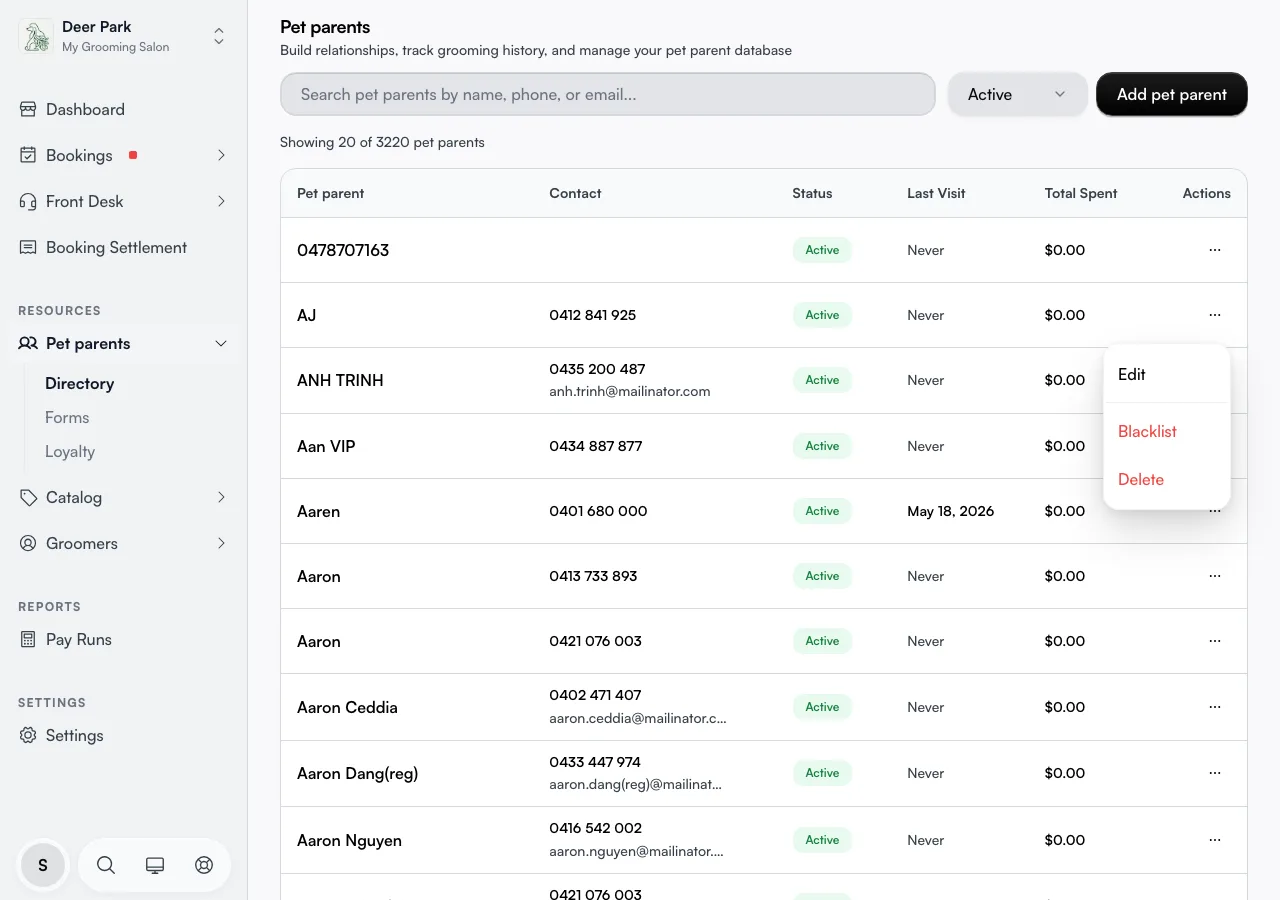
You can pick a reason — No-show repeatedly, Inappropriate behavior, Payment issues, Aggressive or threatening, Violated terms of service, or Other with your own wording. Recording a reason is optional but recommended: it helps the system get smarter at flagging problem customers, and the reason shows on their record so any staff member sees why. Once blocked, the same menu offers Unblock to reverse it.
Blocking stops bookings made from your dashboard. A determined person could still book on your public page under a different email — for a hard stop, also require a deposit and manual approval in your booking policies.
Set someone aside without losing their history
Delete in the row menu looks final, but it is not: it sets the customer's status to Inactive rather than removing the record. Every visit, note, and dollar of spend stays intact — the customer is simply hidden from the default list (switch the status filter to Inactive to find them again). Use it for customers who have moved on, and for test or duplicate entries alike, since nothing is actually erased.
Tips
- A customer who will not appear in search may have been saved with only an email while you searched by phone (or the reverse). Search only matches the details actually on the record.
- Not finding someone you know exists? Check the status filter first — the list hides Inactive and Blocked people by default.
- Two records for the same person usually means one was created at booking and one by hand. There is no one-click merge — the duplicate warning is your best defence, so heed it before saving. To fix an existing pair, keep the better record, copy its notes and labels across, then delete the other.
- Add, Edit, and Delete can each be turned off for certain staff roles, so a team member may not see every option that an owner does (Blacklist and Unblock follow the Edit permission).
Related
- Client profiles — the pet, vehicle, or family-member records attached to a customer.
- Forms — intake and profile forms whose answers show under Forms.
- Ask the AI agent about your notes — search every client and appointment note in plain English.
- Data import — bring an existing customer list in from a spreadsheet.