
Payment methods
Turn on card payments by connecting an account once, get unstuck when setup stalls, see what each card costs, and disconnect safely.
Updated 19 July 2026
You want to take card payments — at the counter, online, and with a card saved on file — without wiring anything up by hand. This page is the one switch that turns all of that on, and the place you come back to when a customer's card won't go through because setup never finished.
Connect a payment account once and card is live on every booking. Cash always works and needs no setup. Everything below happens on Settings → Payments.
Open in app: Payments settings
Turn on card payments for the whole business
Connecting once enables card everywhere — there are no per-method switches to flip afterwards.
- Open Settings → Payments. If you have not connected, you see a Connect Stripe row.
- Click Setup Payments and work through the steps in the popup — business details, a bank account for payouts, and an identity check. Seglo never sees your bank login or password.
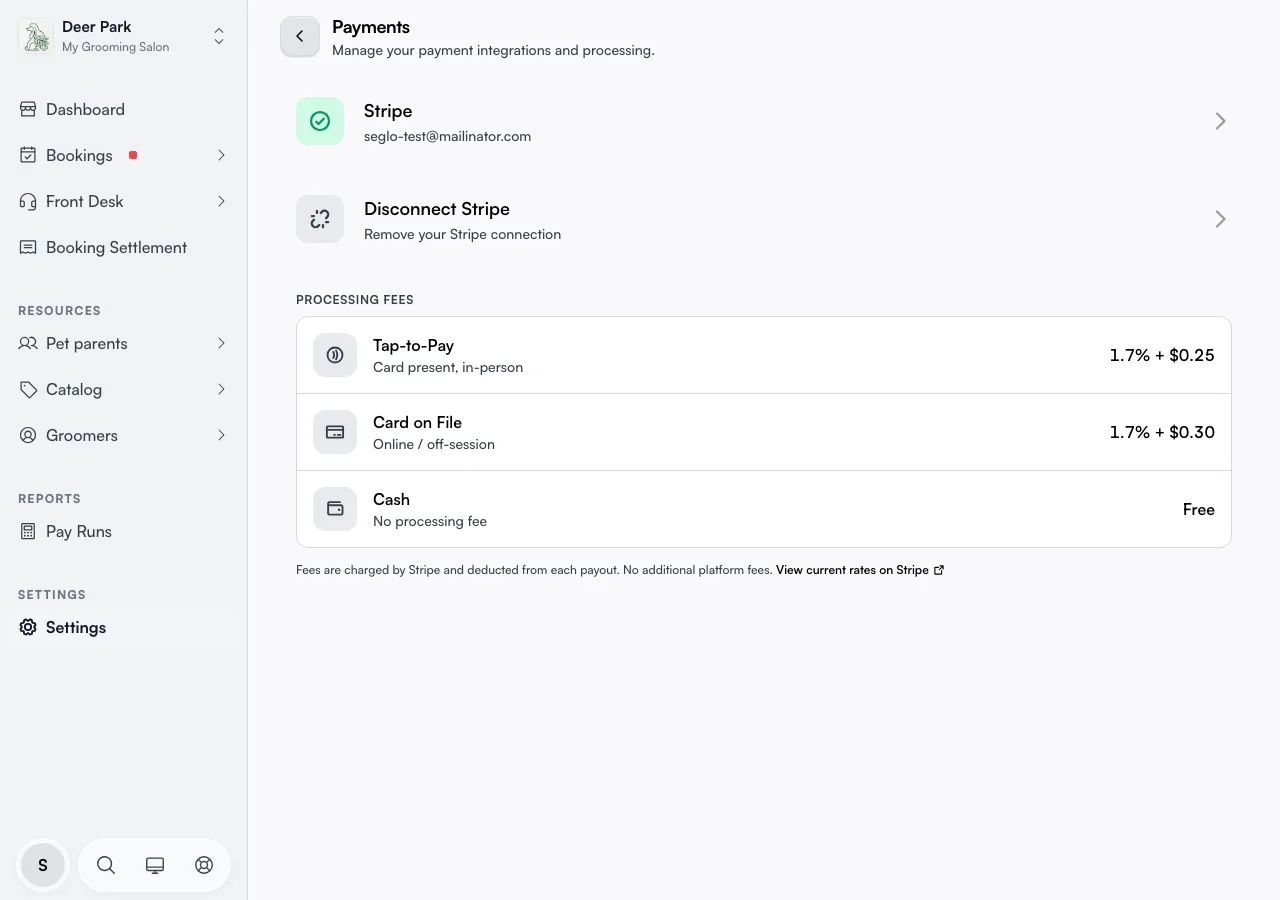
- When it finishes, the row turns into a connected Stripe row with a green tick and the account email.
Once the account is fully set up, card checkout is live on every booking automatically. If you do not have a payment account yet, the popup creates one for you during this step.
Pick up setup where you left off
If you started connecting and closed the tab before finishing, the account already exists — it just is not verified yet. The button now reads Continue Setup instead of Setup Payments, and clicking it drops you back into the same flow rather than starting over.
A status badge on the row tells you exactly what is still missing, and the button label changes to match it:
- ID required → the button reads Verify Identity.
- Bank required → the button reads Add Bank Account.
- Setup incomplete → finish the remaining business details.
- Action required (shown in red) → Stripe is blocking the account until you resolve something; the button reads Complete Setup.
When a badge appears, look at the button — it names the one thing standing between you and live payments. Some states also show a small open-in-new-window button beside the main one that jumps straight to the exact screen Stripe needs.
Wait out "Verifying" without refreshing
After you finish the steps, the account often shows a Verifying badge for a minute or two while Stripe runs its checks — this is normal and you do not need to do anything. The page checks the status on its own and updates the moment verification clears, so card payments can switch on without you reloading.
It also re-checks automatically when you come back to the tab — handy if you stepped over to Stripe in another window. If you want to force a check, use the small refresh button next to the setup button. If it sits on Verifying for a while, a badge will tell you what Stripe is still waiting on.
Open your Stripe account for payouts and history
Once connected, the Stripe row itself is a button. Click it to open your Stripe dashboard in a new tab, where you manage payout timing, see settled transactions, update your bank account, and change account-level settings. Seglo handles taking the payment; everything about where the money lands and when lives in that dashboard.
See what each card payment costs you
Below the connected account, Processing Fees lists the rate for every method. These are charged by Stripe and taken out of each payout — Seglo adds nothing on top.
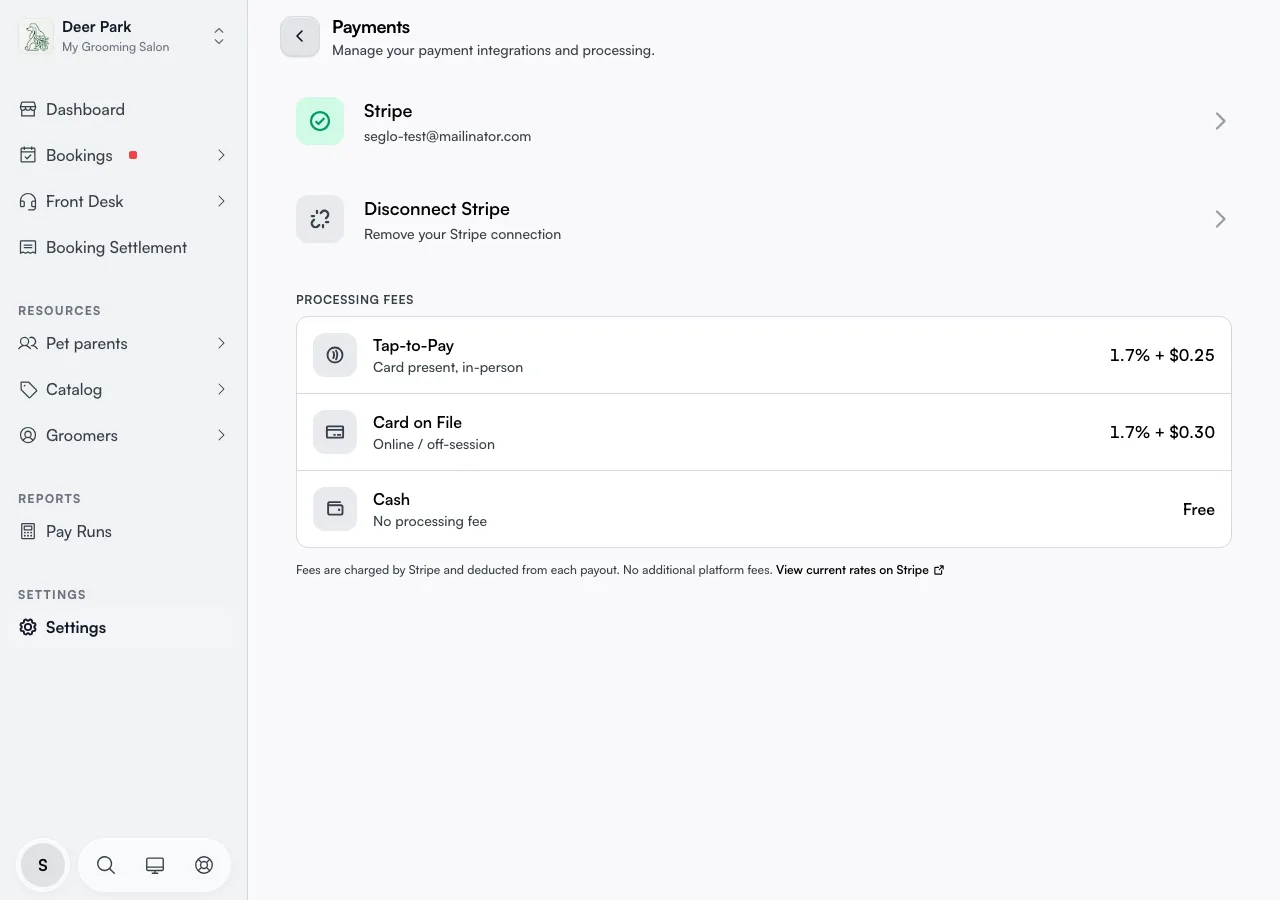
- Tap-to-Pay — card present, in person, when a customer taps their card on the back of a phone. Rate: 1.7% + $0.25. See Tap to Pay on iPhone.
- Card on File — a card saved against a customer, charged online or later. Rate: 1.7% + $0.30.
- Cash — Free. No processing fee, always available, recorded at checkout with no setup.
The rates shown are Stripe's current standard rates for your country. View current rates on Stripe opens Stripe's live pricing page in a new tab if you want to confirm them.
Stop taking card payments safely
To switch card off, open the Disconnect Stripe row and confirm. Read the warning first — disconnecting does three things at once:
- Disconnects your Stripe account.
- Turns off Book by Card, so customers can no longer be asked to hold a booking with a card.
- Ends payment protection on bookings, so no-show and cancellation fees stop being enforceable.
Cards saved on file belong to the account that captured them, so they stop working the moment you disconnect. You can reconnect later — with the same account or a different one — but customers may need to enter their card again. The no-show and cancellation fees themselves are configured in Booking policies.
 Not connected ──[ Setup Payments ]──► Verifying ──► Connected (card live)
       ▲                                                    │
       └───────────────[ Disconnect Stripe ]───────────────┘
Tips
- Connecting is one time only. You never toggle individual methods — card turns on as soon as the account is fully set up, and Tap to Pay, card on file, and online checkout all light up together.
- The page is plan-gated. If you do not see the connect option at all, online payments are not included on your current plan — upgrade to unlock it.
- Tap to Pay needs the Seglo Business iOS app as well as a connected account. Connecting alone does not enable it on the phone — see Tap to Pay on iPhone.
- Stuck on "Verifying" for more than a few minutes? Check the badge — Stripe sometimes needs an extra identity document before it marks the account fully set up. Click the row to resume.
Related
- Payments overview — how a payment moves through Seglo.
- Tap to Pay on iPhone — taking card payments on a phone.
- Daily settlement — closing the day across cash and card.
- Booking policies — where no-show and cancellation fees are set.