Account and login settings
Fix the name on your login, see why your email is locked, and understand exactly what deleting your account erases before you touch the button.
Updated 12 September 2026
This is where your personal login lives — the name attached to it and the options that let you delete a single business or your whole account. It is a different page from your business profile, which controls the business name, hours, and branding.
Open in app: Account
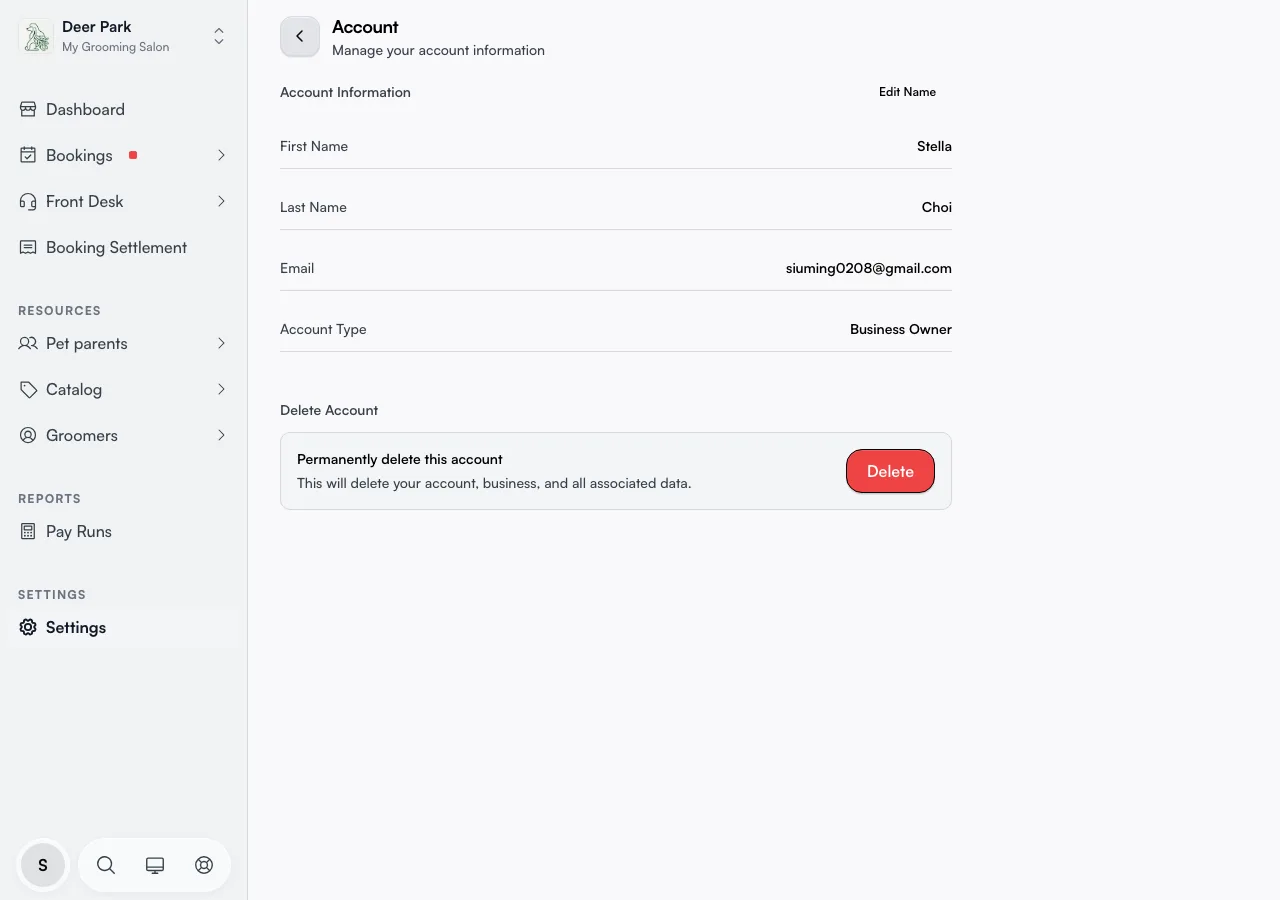
Fix the name shown on your bookings and messages
Your name rides along on every booking you create, every conversation you log, and every notification that goes out, so a stale name shows up in front of clients and staff. To correct it, open Settings → Account, then click Edit Name at the top right of the Account Information section.
Update First Name and Last Name and click Save. The change lands everywhere in the app straight away — the page quietly refreshes your login in the background, which is why you never have to sign out and back in for the new name to appear. Click Cancel to back out without saving.
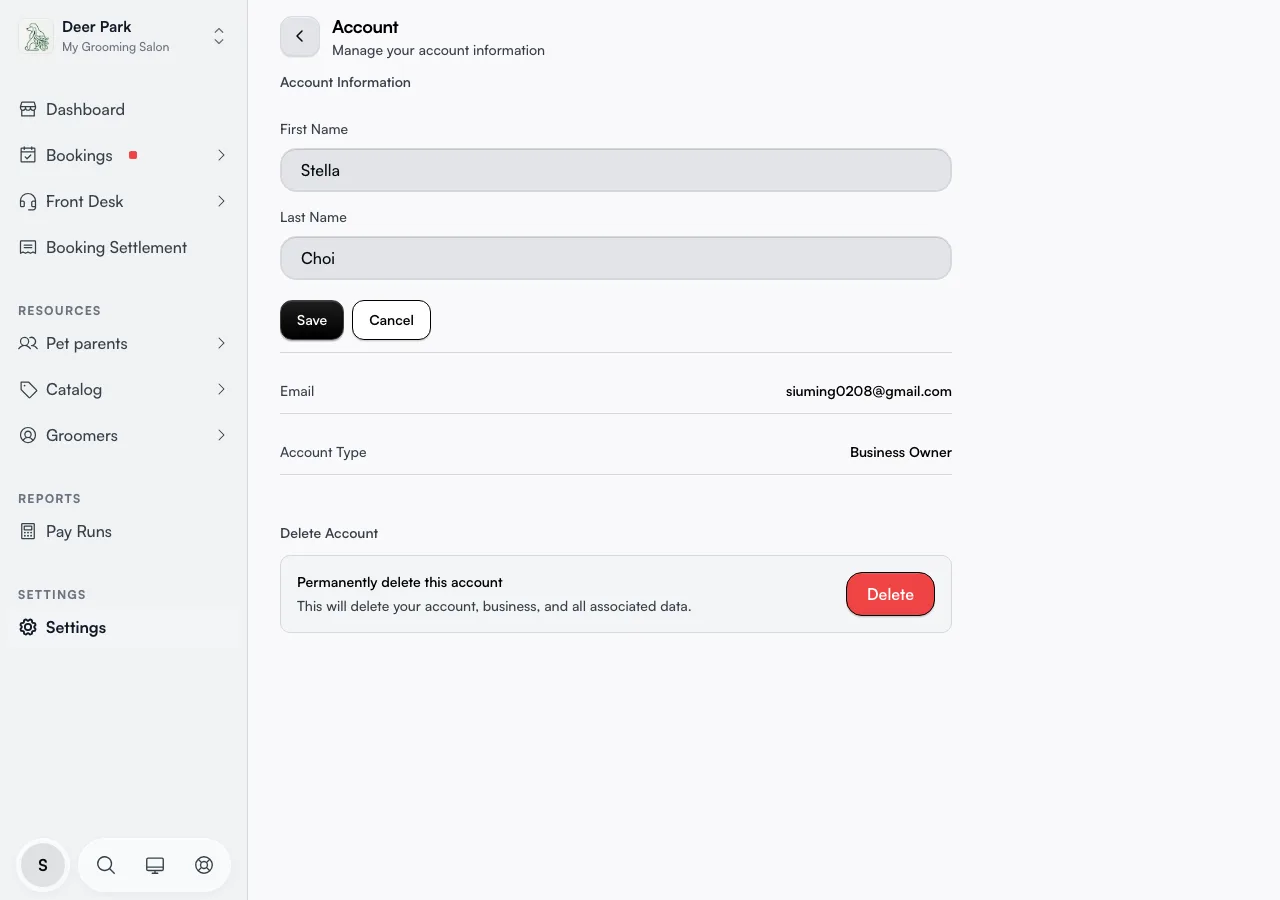
Both First Name and Last Name are required — if either is empty the save is blocked with "First name and last name are required". Any field left blank on the page reads Not set.
Understand why your email and account type are locked
Email and Account Type sit in the same list as your name but have no edit control — they are there for reference only. Your email is the address you log in with, and it cannot be changed from this page. Account Type shows Business Owner to confirm the level of access this login carries.
If you need to move your business to a different email, that is a support task, not a settings change. Deleting and recreating the account is never the way to do it — see the warning below for why.
Delete one business while keeping your account
You can now delete a single business without closing your account. This is a permanent, irreversible action — everything the business owns is removed and the external services it used (Stripe payments, your phone numbers, Xero connection, and uploaded files) are released.
What gets deleted:
- All client records, appointment history, and booking data for this business
- All payments, receipts, gift cards, and financial records
- All staff, resources, and schedule data
- All integrations: Stripe payment account, phone numbers, Xero OAuth connection, and uploaded photos/files (S3)
What stays untouched:
- Your Seglo account and login — you remain signed in
- Any other businesses you own — they are completely unaffected
How to delete one business:
- Go to Settings and scroll to the Danger Zone section at the bottom of the page.
- Click Delete this business.
- Read the consequence page — it lists exactly what gets deleted and what is preserved.
- Click Delete this business (red button) to open the confirmation modal.
- Type the exact business name into the box. The delete button is locked until the name matches exactly (case-sensitive). Click Delete business.
The deletion runs immediately. Seglo releases your phone numbers, cancels subscriptions, disconnects Xero, and removes all files before deleting the database records. A best-effort model applies to external releases: if an external service is temporarily unreachable, the database records are still deleted and Seglo flags the pending cleanup. There is no undo.
If you own no other businesses after deleting, you land on the onboarding screen. Your account login is intact — you can create a new business or contact support.
Delete your whole account (removes everything, including your login)
Deleting your account is the most destructive action in the app — it removes your login AND every business you own in one pass. Use the per-business delete above if you only want to close one location.
- Scroll to the Delete Account section and click Delete.
- Read the Delete Account? dialog. It lists the headline categories that are wiped: your account and personal data, all owned businesses and locations, every appointment past and future, all client and team member data, and all financial records and transactions.
- Type confirm into the box. The Delete Account button stays locked until the word matches — though it is not fussy about capitals, so confirm, Confirm, or CONFIRM all unlock it.
- Click Delete Account. You are signed out and land back on the login screen.
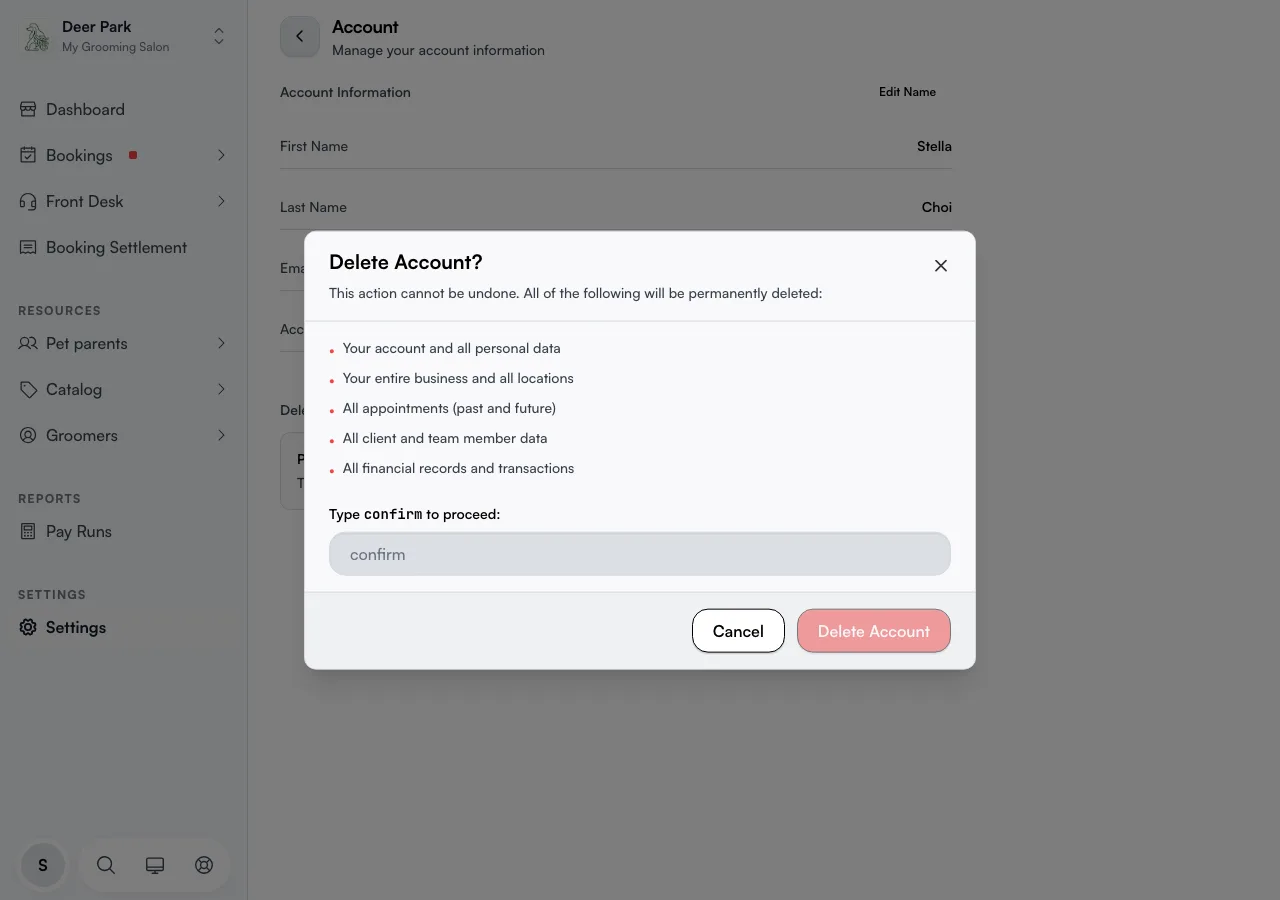
Know the full reach of an account deletion
The dialog lists the headline categories. In one pass it also clears: your call logs and voicemail messages, every SMS conversation, your forms and client responses, your subscription and any add-on modules, your message credit balance and history, your store phone numbers, and your team's pay records and settlements.
Tips
- Delete one business, keep your account. Use Settings → Danger Zone to remove a single business without closing your login — your account and any other businesses survive.
- Export first, delete second. Ask for a copy of your client list, appointment history, and anything else you need before you delete — see Data export. Nothing survives, and support cannot reinstate data you delete yourself.
- Use Edit Name for a rename, never delete. For a name change or rebrand, edit your business profile — deletion is the wrong tool and there is no undo.
- Your email is fixed here. For a login or email problem, contact support rather than reaching for the delete button.
Related
-
Report a problem — tell Seglo when something is not working.
-
Business profile and information — the business name, hours, and branding, separate from your personal login.
-
My profile — the staff-facing profile with bio and photo, for team members.
-
Subscription plan and upgrades — your plan and billing, which a deletion also removes.
Related