
Business profile and information
Set the name, hours, timezone, locations, and branding every booking page and invoice pulls from.
Updated 20 July 2026
This page is your business's identity — the name customers see when they book, the address on every invoice, and the two settings that quietly decide whether customers can book at all: your timezone and your opening hours. A wrong timezone shifts every calendar day; an empty set of hours shows "no times available". Get these right once and every email, receipt, and booking page stays consistent.
The page has three tabs: Overview (identity and locations), Branding (logo and booking-page images), and Google Online Booking. You need the owner role to edit it.
Open in app: Business profile
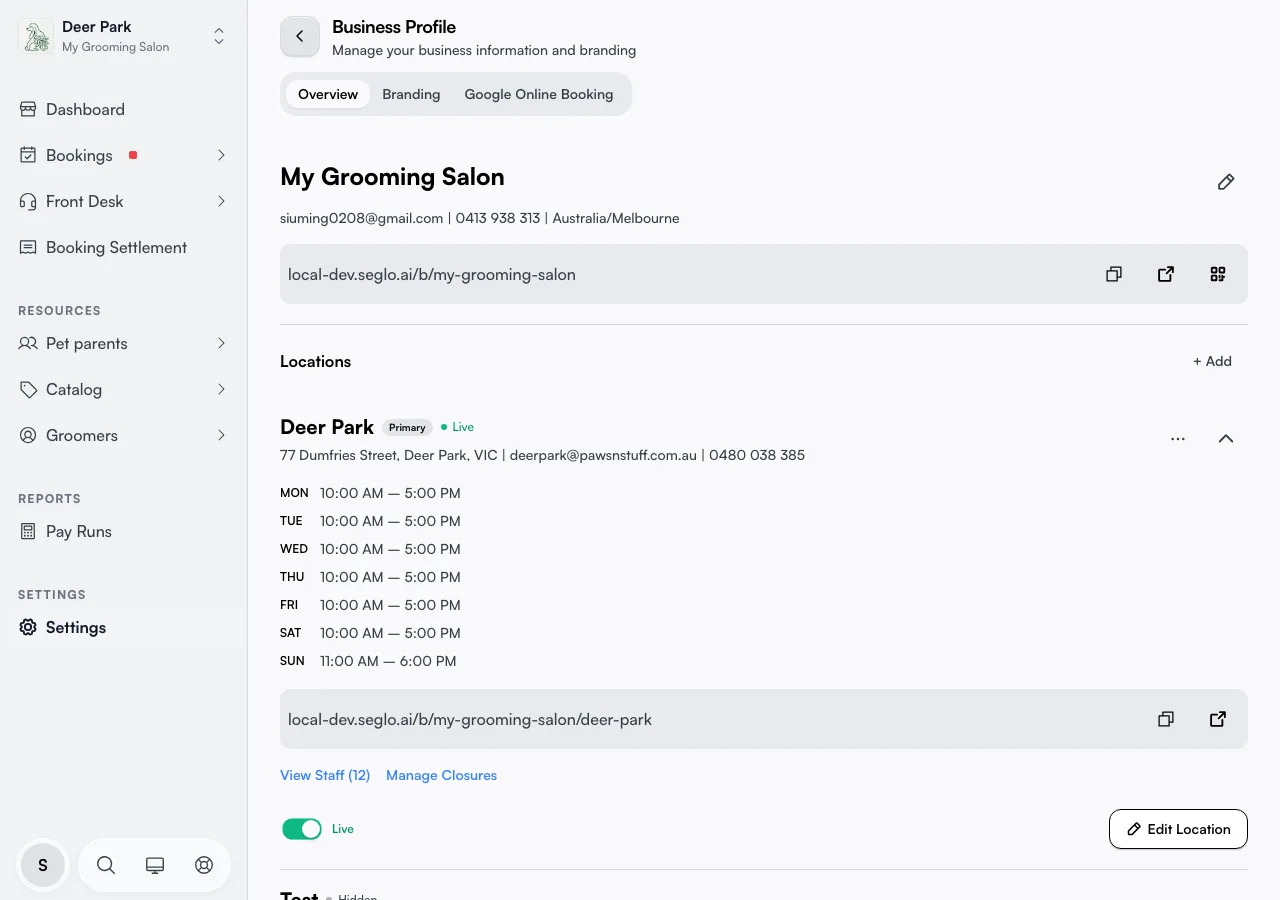
Set the name, contact details, and timezone customers see
The page opens on Overview. Click the pencil icon beside your business name to open one form covering your name, contact email, phone, website, description, and business type. The description and business type both shape how your booking page reads, so they are worth filling in even though nothing forces you to.
Your timezone is shown alongside your contact details but is not an editable field on this form today. Reminders, reports, your daily summary, and which calendar day a booking lands on all read from it.
Under the name sits your booking page link, with three buttons: copy it, open it in a new tab, and show a QR code customers can scan in person at the counter.
Change link edits the handle in that URL — the part after seglo.ai/@. Seglo checks the new handle is free as you type, then asks you to confirm, naming both the old and the new URL. Confirm and the old link stops working immediately and permanently: there is no handle history and no redirect, so anything already printed, texted, or listed on your Google Business Profile will land on a "not found" page. Change it before you start sharing the link, not after.
The same edit form has a Google review link field. Paste your business's Google "write a review" link here and Seglo starts drafting a review-request message after every completed appointment for staff to review and send — see Review requests for how that works. Leave it blank and nothing changes; review requests simply don't generate until it's set.
Get every customer booking onto the right hours
Each location carries its own weekly opening hours, and bookings can only land inside them — a location with no hours set accepts none. Open a location, click Edit Location, and set a start and end time for each day. Leave a day with no time slot and it shows as Closed.
Two controls here are easy to miss:
- Split shifts. Open the + menu on any day and choose Add time slot to give it a second block of hours — set 9am–1pm and 2pm–6pm and the gap becomes a lunch break customers can't book into. Most owners never realise a day can hold more than one block.
- Copy hours to other days. Click the copy icon next to a day to stamp its hours onto the rest of the week, then tweak the exceptions. It saves setting seven days by hand.
Close for a holiday without touching your hours
To shut for a public holiday or a one-off day, open a location's Manage Closures link. You get a calendar — click any future day to mark it closed, click again to undo, and the panel saves every change at once. Closed days disappear from your booking page immediately.
The calendar quietly warns you before you cause a problem: an amber dot on a day means there are already appointments or waitlist entries on it. Hover for the exact counts before you close — closing a day with bookings on it is the kind of mistake that turns into angry customers. Use the month arrows to step forward and plan a season of closures.
Add a second branch (and pick which is primary)
Your first location is tagged Primary, and its address is what flows onto invoices and the top of your booking page. To add another branch, click + Add beside the Locations heading.
Adding a second site needs a plan that includes multi-location. If the + Add button is locked, your current subscription plan is the reason — upgrade to unlock it. Once you have more than one, open any non-primary location's ⋯ menu and choose Set as Primary to promote it; the invoice and booking-page address follow.
Run an online-only business with no address
When you create or edit a location, tick Online-only business (no physical location) to skip the address entirely — right for mobile groomers, home visits, or virtual consults. The address fields vanish and the location still works for booking.
For physical sites, start typing in the address search and pick your address from the list — it fills the street, suburb, state, and postcode for you. If the search can't find you, click Enter address manually to type each field. Tick Also use this address as billing address to point your invoices at it in one step.
Give a branch its own link and phone number
Each location has its own booking link (shown when you expand the location) and its own slug — the readable segment after your business handle. Open Edit Location and edit the slug to turn the default into something like /@your-shop/cbd instead of a random code. A clean link is easier to share and print.
The same edit form lets a branch use its own contact phone and email, separate from the business-wide ones — useful when each shop has a different front desk. If you have Seglo phone numbers, you can pick one from the list rather than typing it.
Check a location is staffed before you publish it
Expand a location and click View Staff to see exactly who is bookable there. If it reads No bookable staff, customers can pick the service but never find an available time — this is a common cause of a silently dead booking page.
Each location has a Live / Hidden switch. Flip it to Live to publish that branch to customers, or Hidden to take it offline without deleting anything.
Archive a location that has closed
If a branch has permanently closed but you need to keep its booking history, reports, and Xero records, archive it instead of deleting it. Archiving hides the location from every business screen — the switcher, schedule, catalog, and staff calendar — and prevents new bookings, while all historical data is preserved. Customers can no longer book it (it is automatically unpublished), but nothing is deleted.
To archive, open the location's ⋯ menu on the Overview tab and choose Archive. A dialog opens with two checks:
-
Conflict guard. If the location has any upcoming bookings (Pending or Confirmed) or active waitlist entries, the Archive button is disabled. The dialog shows the counts. You must cancel or reschedule those bookings first, then reopen the dialog.
-
Type-to-confirm. Type the exact location name to enable the Archive button. This step prevents accidental archives.
If this is your only published location, the dialog warns you that archiving it takes your whole business offline to customers — their booking page will show as unavailable. That is a warning, not a block; you can proceed if you are intentionally closing.
Once archived, the location moves to a separate Archived section lower on the Overview tab. All booking history, reports, and Xero data remain intact.
Restore an archived location
If you archived a location by mistake, or a closed branch is reopening, select Restore from its ⋯ menu in the Archived section. Restoring clears the archive flag immediately — no conflict check is needed because restoring is always safe.
After restoring, the location returns to your active list as Hidden (unpublished). It will not be visible to customers until you flip its switch to Live. Restore does not republish automatically — you must publish it yourself as the deliberate next step.
Brand your booking page
Open the Branding tab to control how your business looks to customers.
- Business Logo — upload a square (1:1) image. It renders as a circle on your booking page and invoices. A crop tool opens on every upload so you can frame the square before it saves.
- Booking Page Hero Section — the wide cover image at the top of your page. A 16:9 crop tool opens on upload so you frame the banner before it saves. The side image style control switches the side image between Rectangle and Square to suit your photos.
- Photo Gallery — extra brand photos shown lower on the page. A crop tool opens on each upload; you can crop to a preset or leave the crop free to keep the whole image.
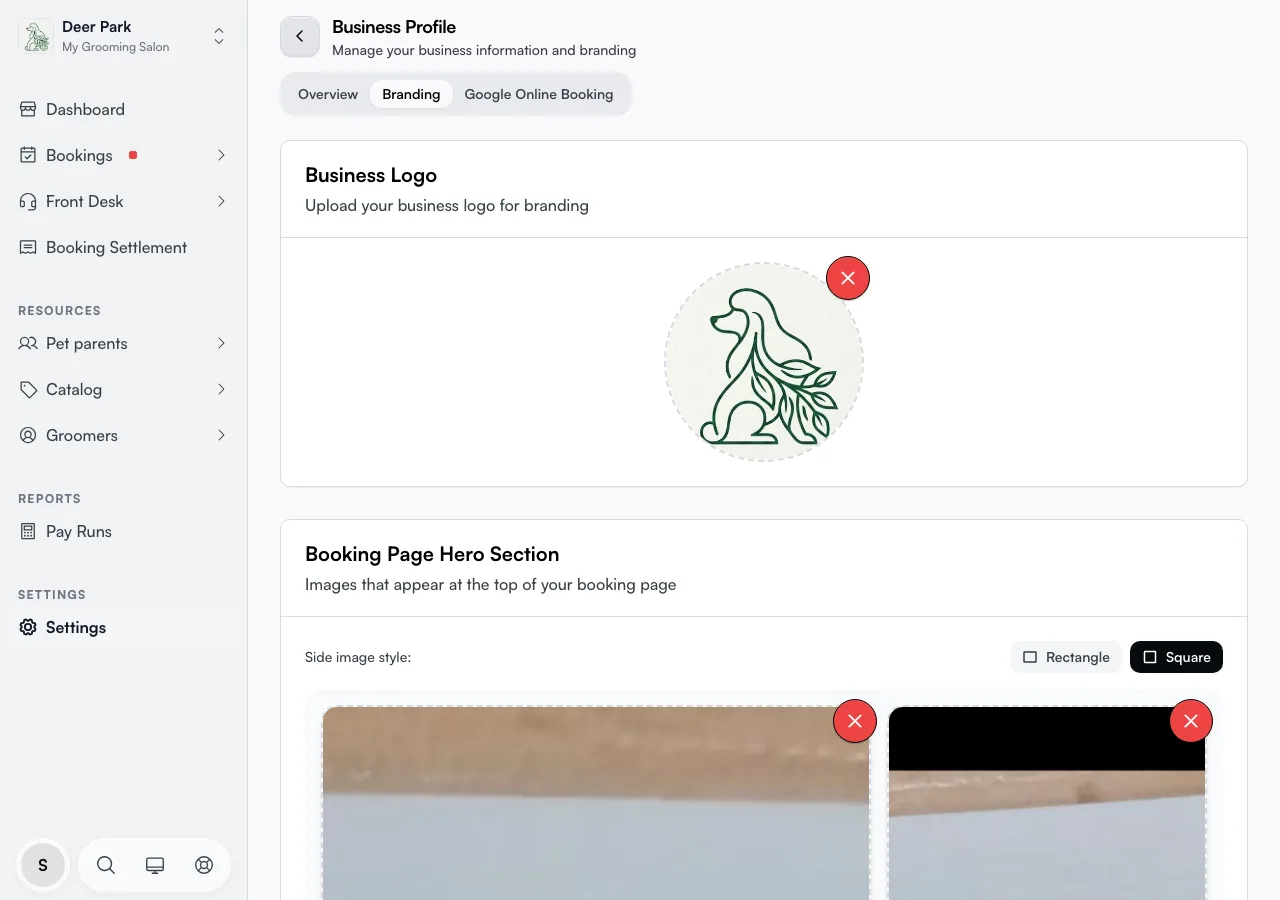
All three image types (logo, hero, gallery) render the moment they save — you will not see a frozen or broken image tile while the file is being processed in the background. The side image style is different — it triggers a floating You have unsaved changes bar, and you must click Save Changes there or the switch is dropped when you leave.
Get found on Google
The Google Online Booking tab adds a Book Online button to your Google Business Profile, so people who find you on Google Search and Maps can book without visiting your site first.
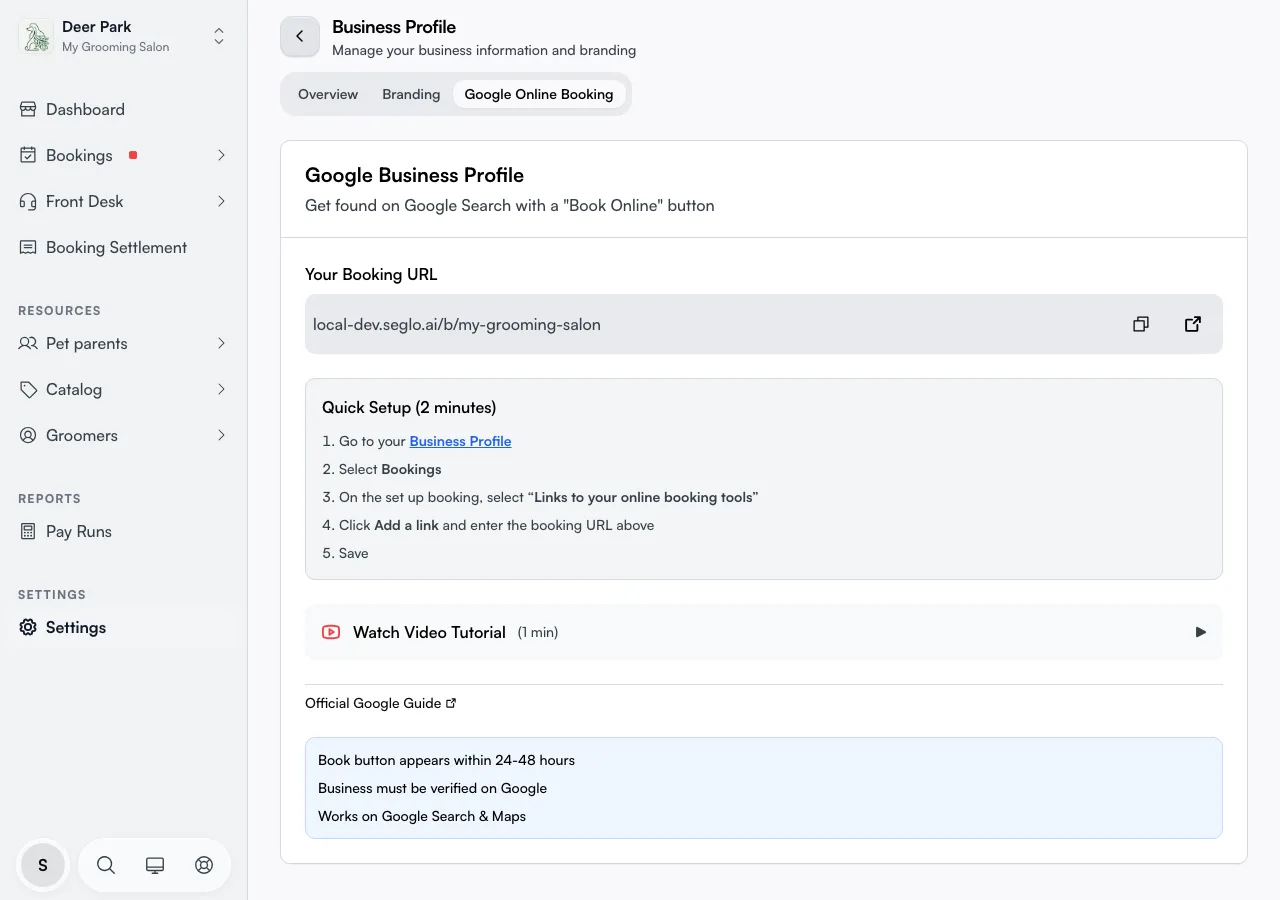
Copy Your Booking URL, then follow the Quick Setup (2 minutes) steps to paste it into your Google profile. There is a one-minute video tutorial on the page if you'd rather watch it done. The button appears within 24 to 48 hours, and only if your business is already verified on Google.
Tips
- Your timezone drives every calendar day. Reminders, reports, and your daily summary all read from it, and it isn't an editable field on the Overview edit form today.
- A location with no opening hours accepts no bookings — the first thing to check when slots look empty.
- Split a day into two blocks with Add time slot to carve out a lunch break customers can't book into.
- The amber dot on the closures calendar means existing bookings sit on that day — check the count before you close it.
- The crop tool opens for every branding image. Logo crops to a 1:1 square; hero crops to 16:9; gallery lets you choose a preset or leave it free. Frame the subject before confirming — you can't re-crop after saving without re-uploading.
- The side image style needs a manual save — watch for the unsaved-changes bar or the switch is lost.
Related
- Account and login settings — your personal name and login, separate from the business identity.
- Subscription plan and upgrades — what controls the multi-location entitlement behind the + Add button.
- Resources and rooms — the bookable spaces and equipment that, like staff, decide whether a slot is offered.
- Service photos and portfolio — uploading the photos that fill the booking page gallery.